
OFFICIAL PRO II OWNER’S GUIDE
Tee Pal Pro II Instructions
Less Bending. More Golf.
Your complete guide to TeeSure™ height control, loading, tee placement, release, standing, and retrieval with Tee Pal Pro II.
TeeSure™ is factory preset. No adjustment is needed before first use. Practice a few repetitions on an actual tee box.
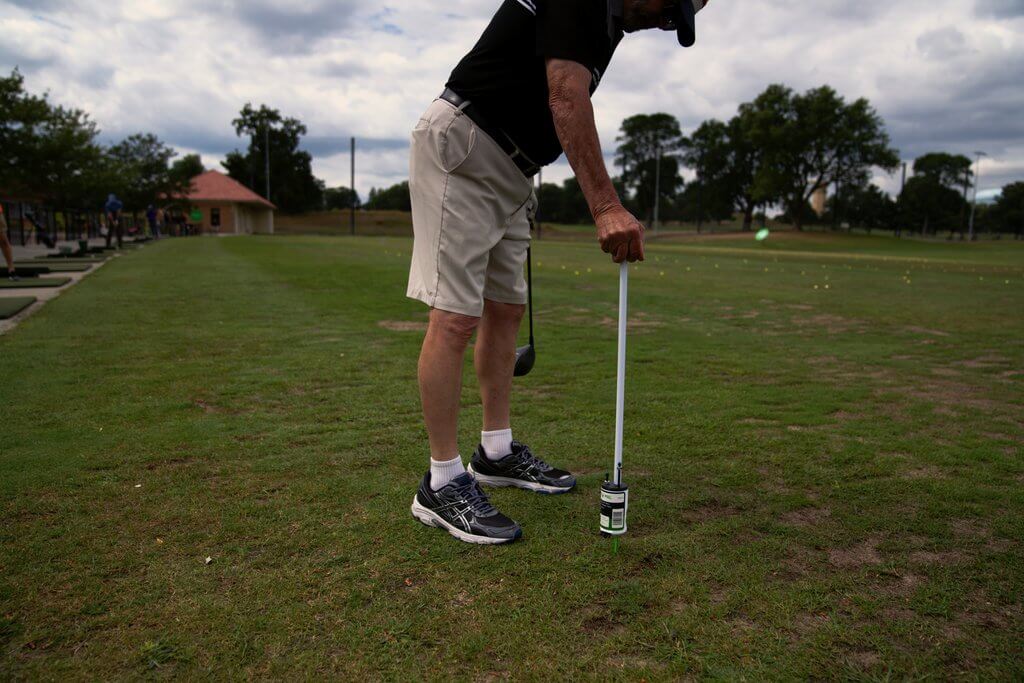
Before You Start
Practice on a real tee box: yard soil, taller grass, and ground conditions can behave differently than course tee boxes. A few practice reps make a big difference.
Keep Tee Pal vertical. Push the tee straight down, perpendicular to the turf.
Keep squeezing. Maintain firm handle pressure until the tee is fully set.
Release slowly. Open the handles slowly, lower Tee Pal slightly, then move away.
Keep the tee slot clear of dirt and grass for smooth placement.
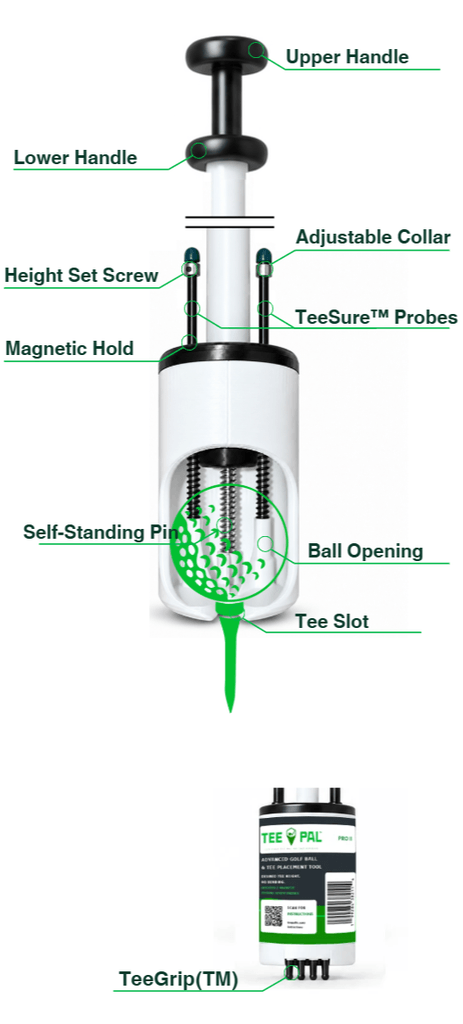
Know Your Pro II
Upper Handle
Upper grip in the handle assembly.
Lower Handle
Lower grip used while operating Tee Pal.
TeeSure™ Probes
Press either TeeSure probe inward until you hear a click during the squeeze step.
Adjustable Collar & Height Set Screw
Components of the Pro II TeeSure™ height-control system. The system is factory preset; no adjustment is required before first use.
Magnetic Hold
Magnetic hold component identified on the Pro II assembly.
Ball Opening
Opening that holds the golf ball during loading and placement.
Tee Slot
Slot beneath the ball opening where the tee is loaded.
Self-Standing Pin
Extendable pin that helps Tee Pal wait upright in turf.
TeeGrip™
Feature for picking up a tee lying on the ground.
TeeSure™ Height Control
Ready out of the box. TeeSure™ is factory preset. No adjustment is required before your first use.
During Step 2, squeeze the handles, then press either TeeSure™ probe inward until you hear a CLICK. Continue with the normal tee-placement motion while maintaining handle pressure.
The adjustable collar, height set screw, probes, and magnetic hold are identified in the parts diagram. For height adjustments or calibration questions, contact Tee Pal Support before changing factory settings.
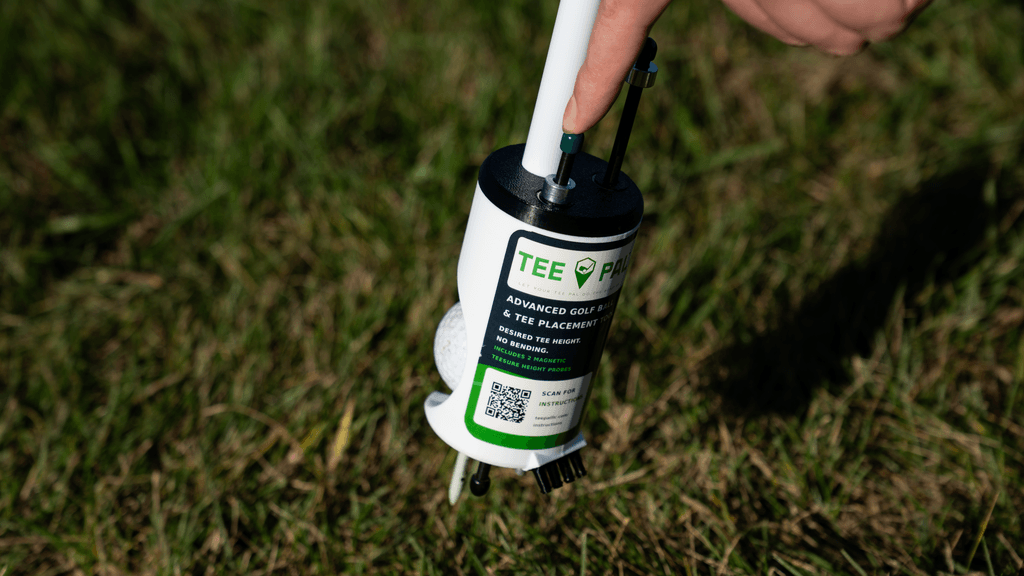
How to Use Tee Pal Pro II
Follow these six steps in order. For Pro II, engage TeeSure™ during Step 2, keep squeezing through tee placement, and release slowly before moving away.
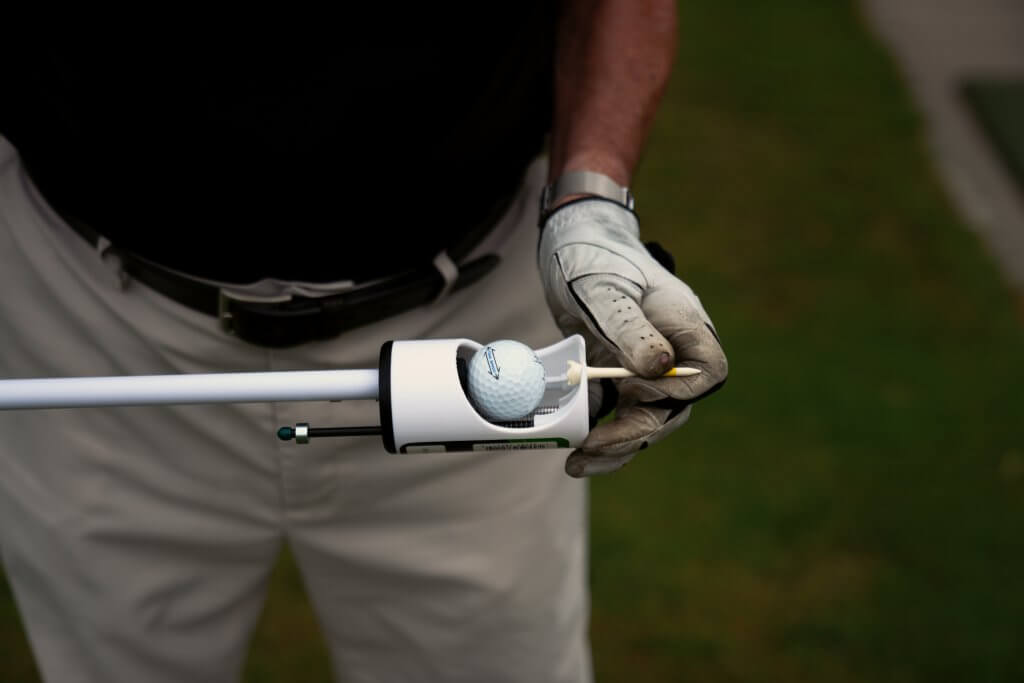
01 LOAD
Hold Tee Pal horizontally with its opening facing upward.
Drop the golf ball into the ball opening, then slide the tee into the tee slot below the ball.
Make sure both are seated before proceeding.
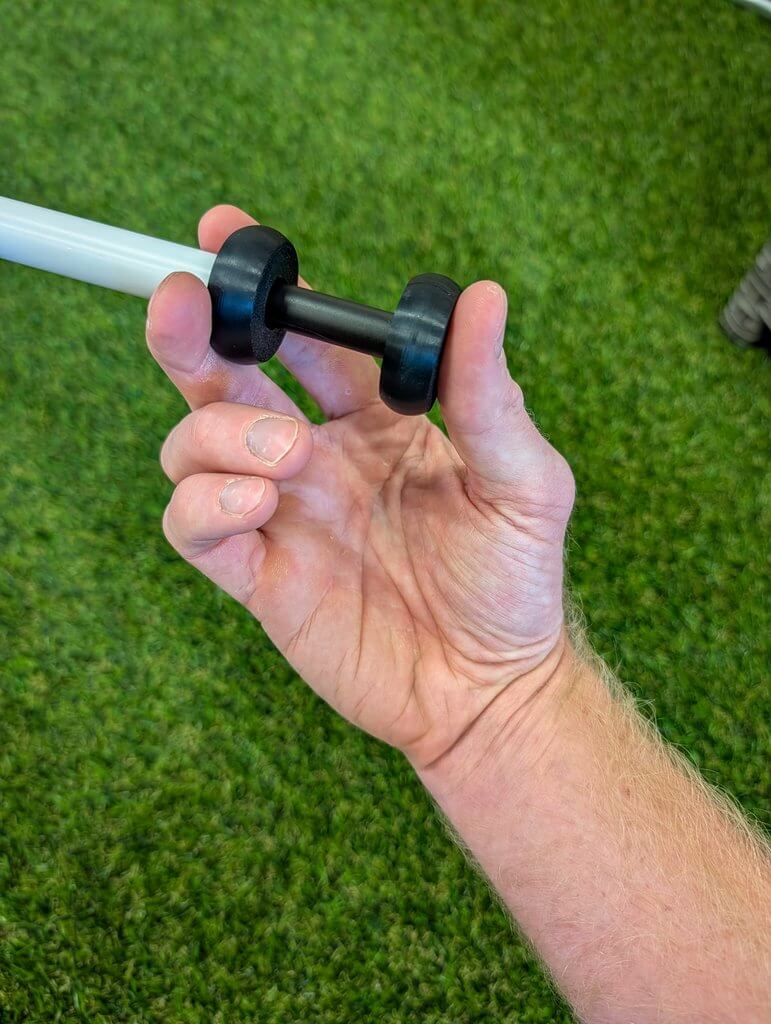
02 SQUEEZE
Move your dominant hand to the handles: thumb on top, index and middle fingers below.
Squeeze firmly. PRO II: Engage TeeSure™ by pressing either probe inward until you hear a CLICK. Keep your grip steady through tee placement.
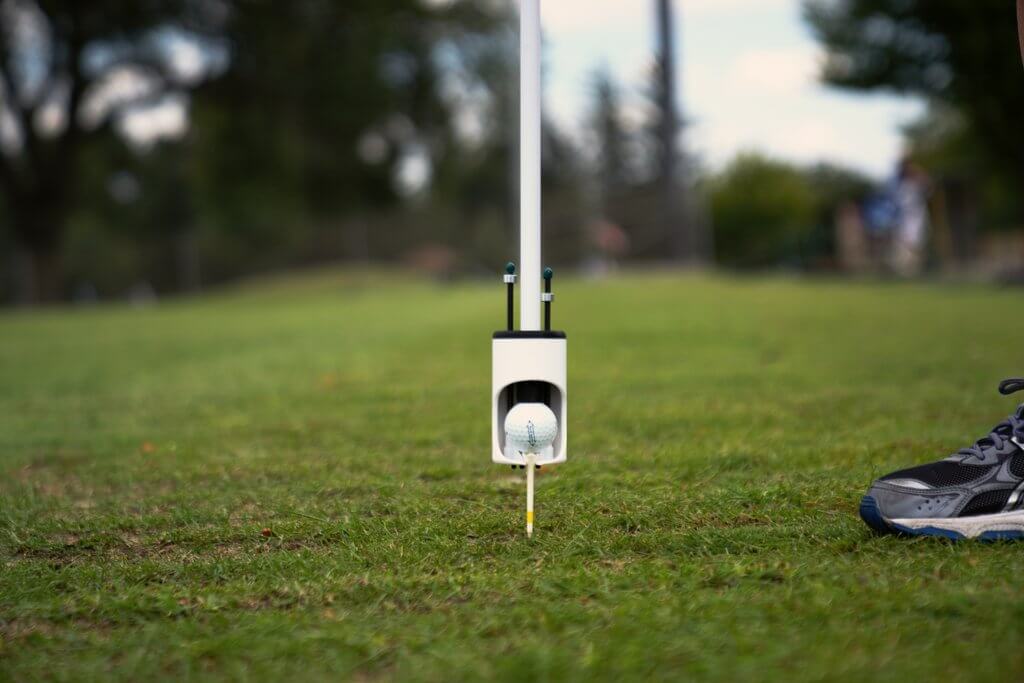
03 TEE
Rotate Tee Pal upright while keeping the handles squeezed.
Keep the device vertical and push the tee straight down into the ground until it reaches your preferred height.
If the ground is firm, use GroundStart™ (explained below) instead of forcing the tee.
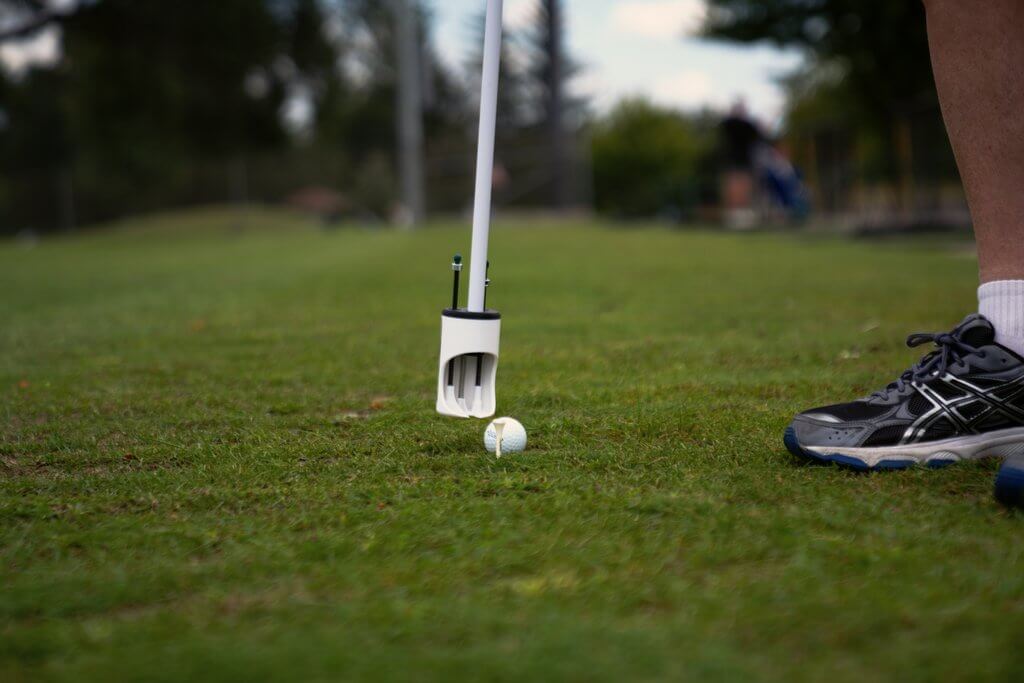
04 RELEASE
A. RELEASE SLOWLY — Gradually open the handles.
B. LOWER SLIGHTLY — Lower Tee Pal a little to clear the ball and tee.
C. MOVE AWAY — Only then move the device away from the ball.
Keep the ball and tee vertical. A rushed or angled movement can knock the ball off.
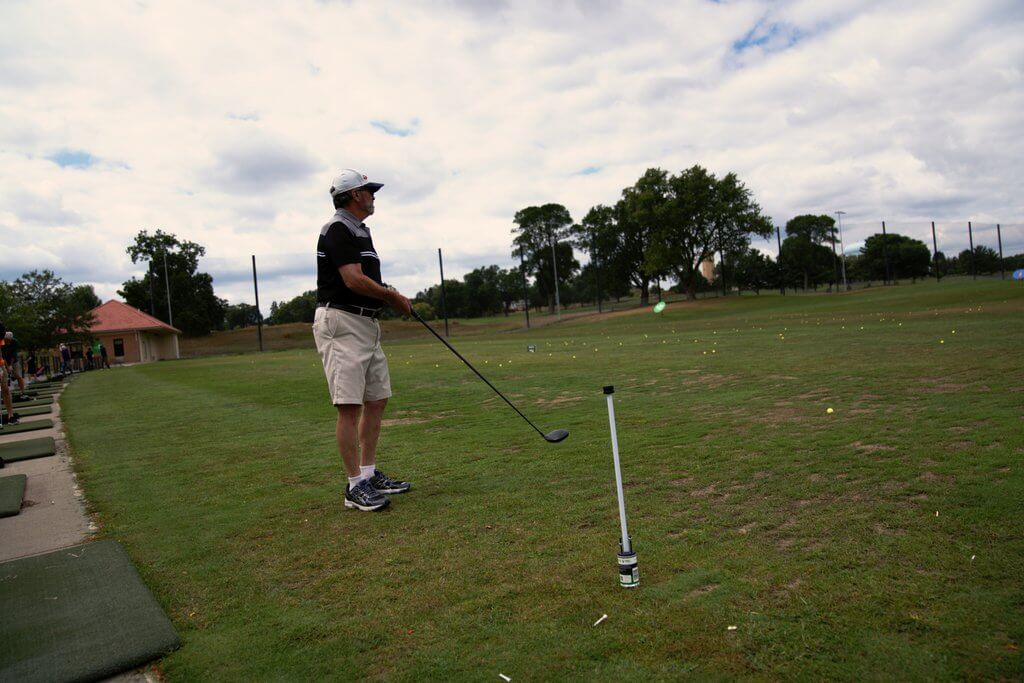
05 STAND
Fully squeeze the handles to extend the Self-Standing Pin.
Press the pin into the turf so Tee Pal waits upright while you take your shot.
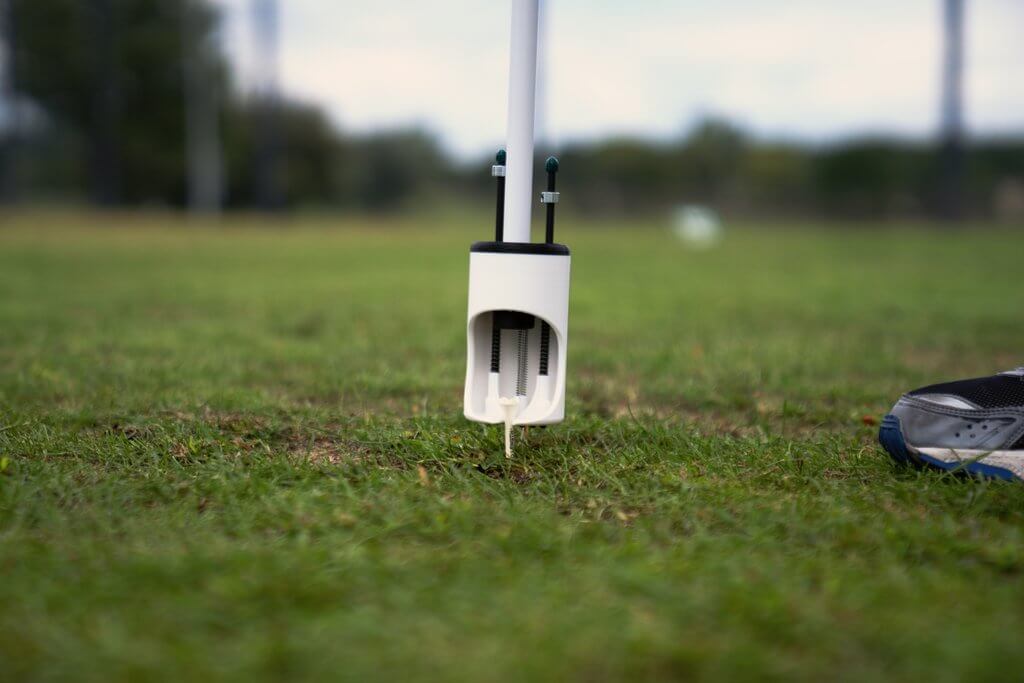
06 RETRIEVE
If the tee is still in the ground, use the tee-holder area to retrieve it.
If the tee is lying on the ground, use TeeGrip™: align with the tee shaft, press straight down while holding the lower handle, and lift.
GroundStart™
For firm turf, make a straight starter hole with the Self-Standing Pin. Withdraw the pin, then guide the loaded tee into the same hole when placing the ball.
Avoid angling the tee into firm ground.
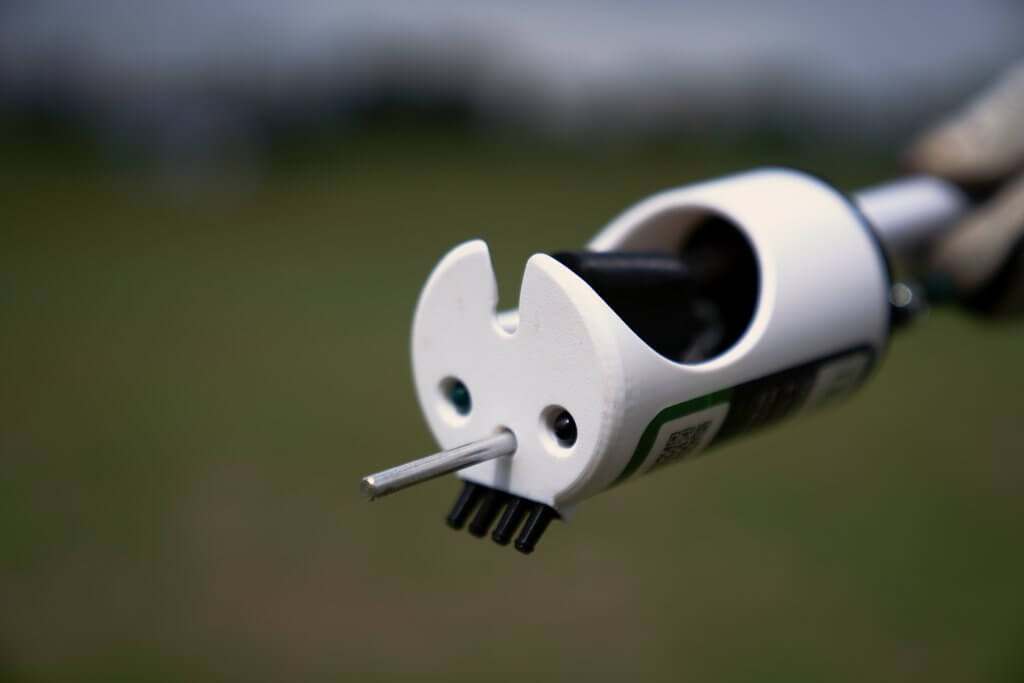
TeeGrip™
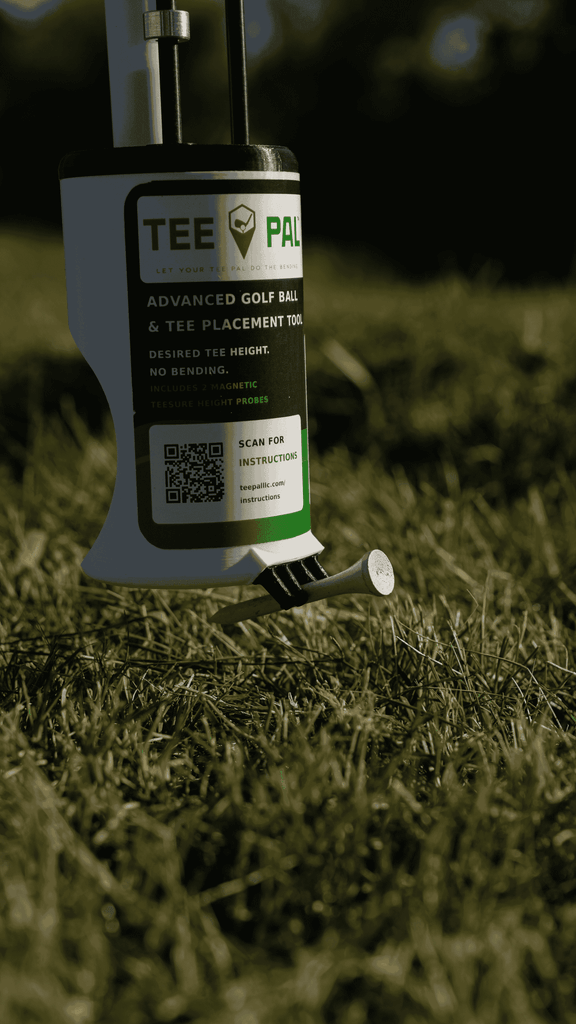
Designed for a tee lying on the ground. Hold Tee Pal by the lower handle, position TeeGrip above the tee shaft, press straight down, and lift.
ALIGN → PRESS DOWN → LIFT
Tips for Reliable Tee Placement
Practice on an actual tee box. Your home lawn may not behave like course turf. TeeSure™ is factory preset; engage either probe until it clicks during Step 2.
Stay vertical and maintain firm handle pressure during placement.
Make the release a three-part motion: release slowly, lower slightly, move away.
Use GroundStart™ in firm turf.
Keep the tee slot free of accumulated grass and dirt.
Troubleshooting
Ball falls off when I remove Tee Pal
Keep the tool vertical; open the handles slowly, lower slightly, and only then move away.
Tee will not push into the turf
The ground may be firm. Use GroundStart™ to create a straight starter hole, then place the tee into that hole.
Practice at home works but the course feels different
Try a few repetitions on an actual tee box. Soil firmness and grass height can change the feel of placement.
Tee is sticking in the tee slot
Check for dirt or grass and clear the slot before trying again.
How do I engage TeeSure™?
During Step 2, press either TeeSure probe inward until you hear a CLICK. Then continue to tee placement.
Do I need to adjust TeeSure™ before using Pro II?
No. TeeSure™ comes factory preset and needs no adjustment before first use. For questions about later height adjustments, contact Tee Pal Support.
TeeGrip™ does not pick up the tee
Align TeeGrip directly over the tee shaft, press straight down while holding the lower handle, then lift.
Quick Reference
LOAD → SQUEEZE + TEESURE™ CLICK → TEE → RELEASE → STAND → RETRIEVE
Release slowly → lower slightly → move away.